
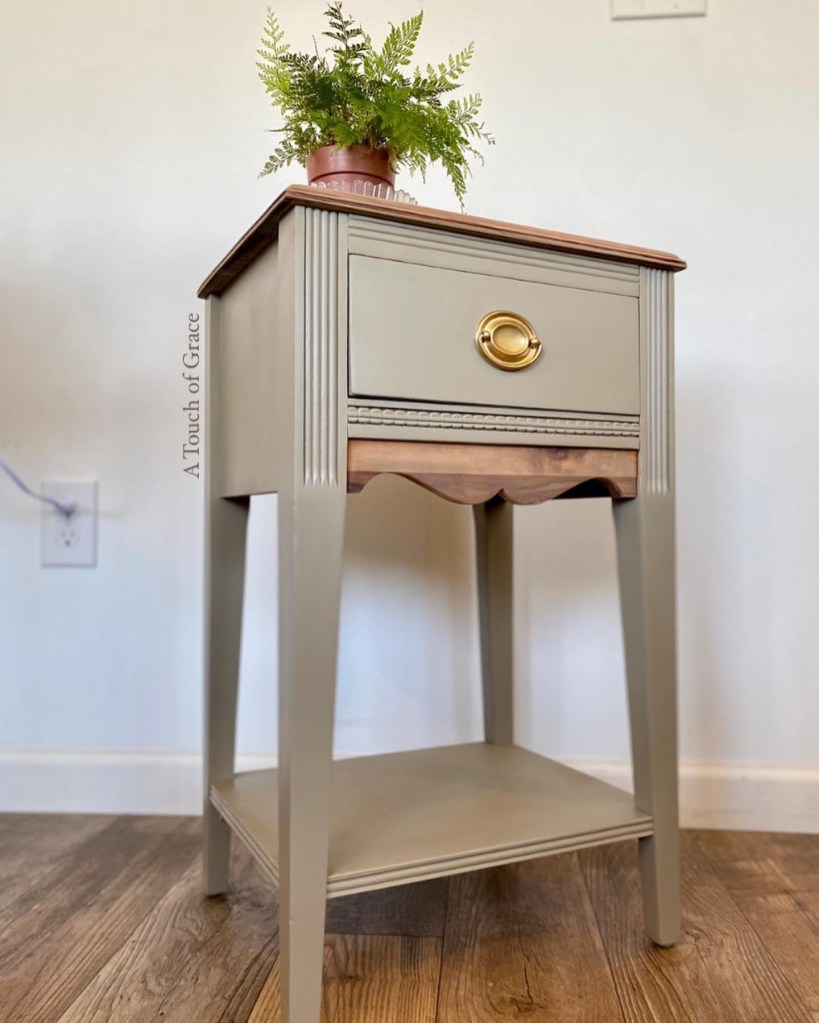
Little flips, that don’t take long, ARE. THE. BEST.
Here you’ll watch how I flip a sad little table into a gorgeous statement piece! In this post, I walk you through the process and what products are used so that you too can achieve this look.
Steps:
- Core Materials Used
- Inspect + Redesign Plan
- Remove Veneer
- Clean & Sand
- Apply White Wash & Wood Conditioner
- Add Drawer Liner
- The Reveal
Core Materials Used
I receive commissions for purchases made through links in this post.
- Sander: Dewalt Palm Sander
- Sandpaper: 60 grit, 100 grit, 150 grit, 220 grit
- Safety Protection: Respirator
- Scraper: Husky Paint Scraper tool
- Paint: Kilz Tribute – Heirloom Brooch
- Polish & Conditioner: Howard’s Feed-n-Wax
- Drawer Liner: Gray and White Queen Anne’s Lace
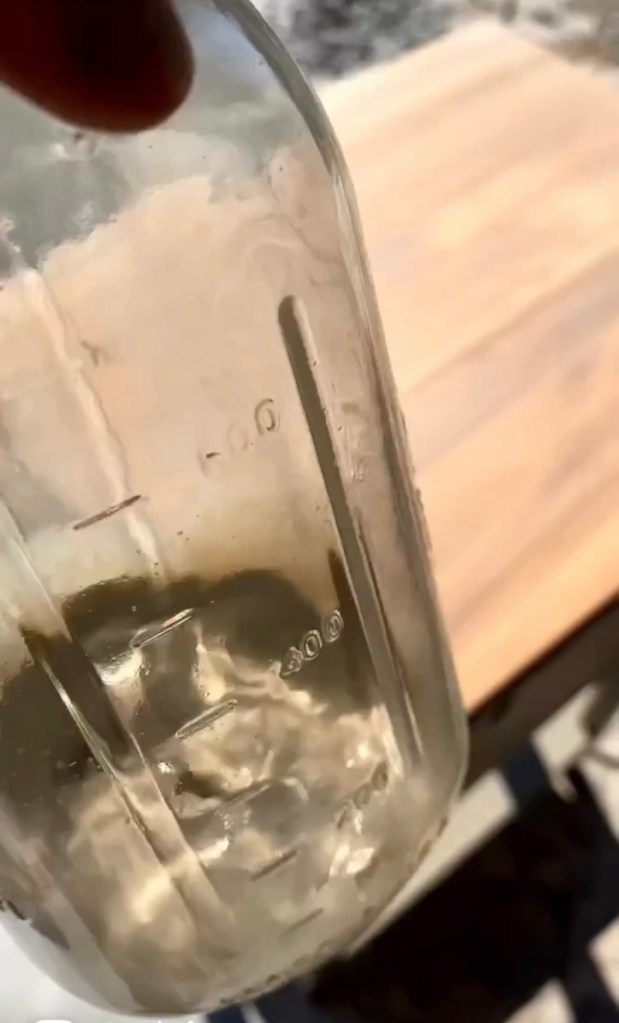
- Cleanser: Bar Keeper’s Friend
Inspect + Redesign Plan
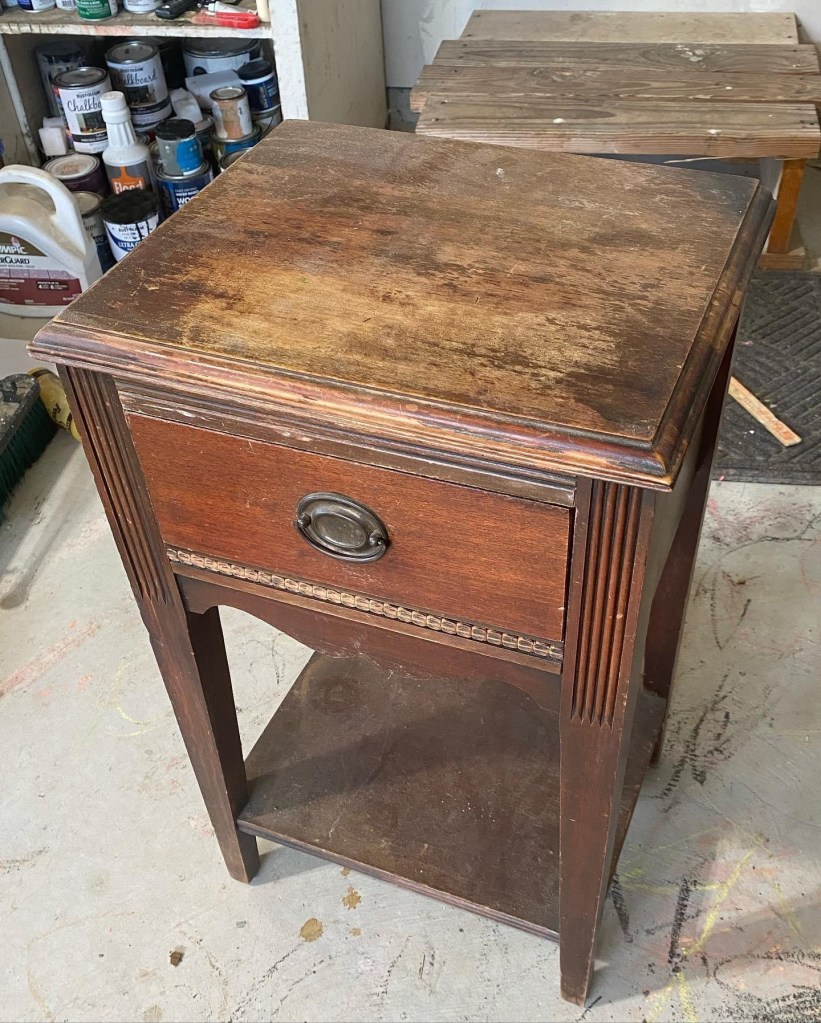
I started out by examining the side table and deciding which parts I wanted to paint and which parts I wanted to keep wood.
Remove Veneer

When I inspected it, I noticed how the veneer was basically just flaking off in large sections.
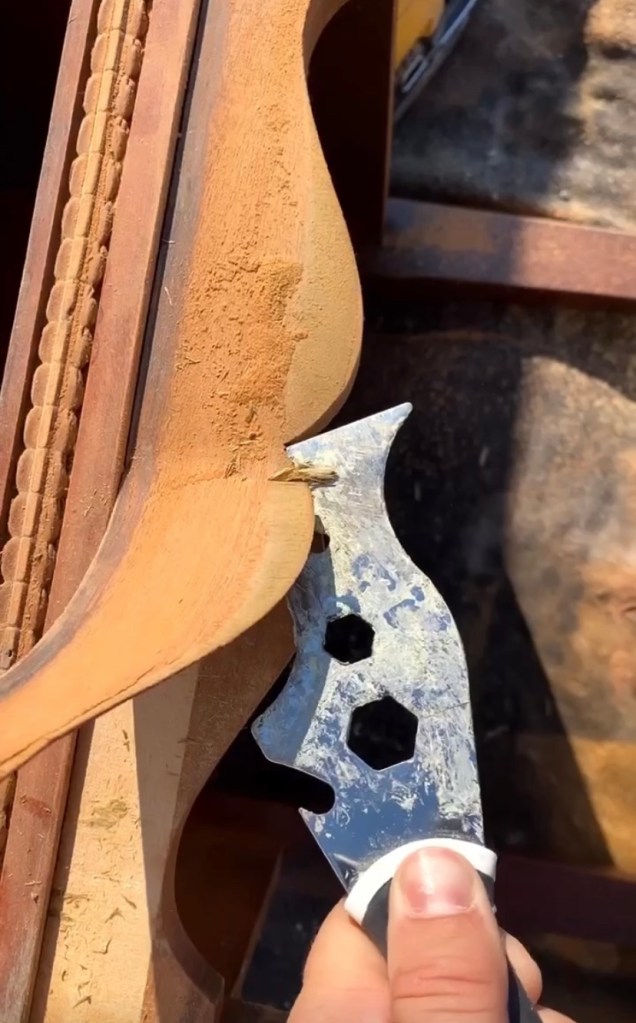
This piece was VERY worn which made the veneer easy peasy to peel away by hand and a little scraping. (Find my step-by-step guide on an insanely easy way to remove veneer here for the more difficult projects!)
Clean & Sand
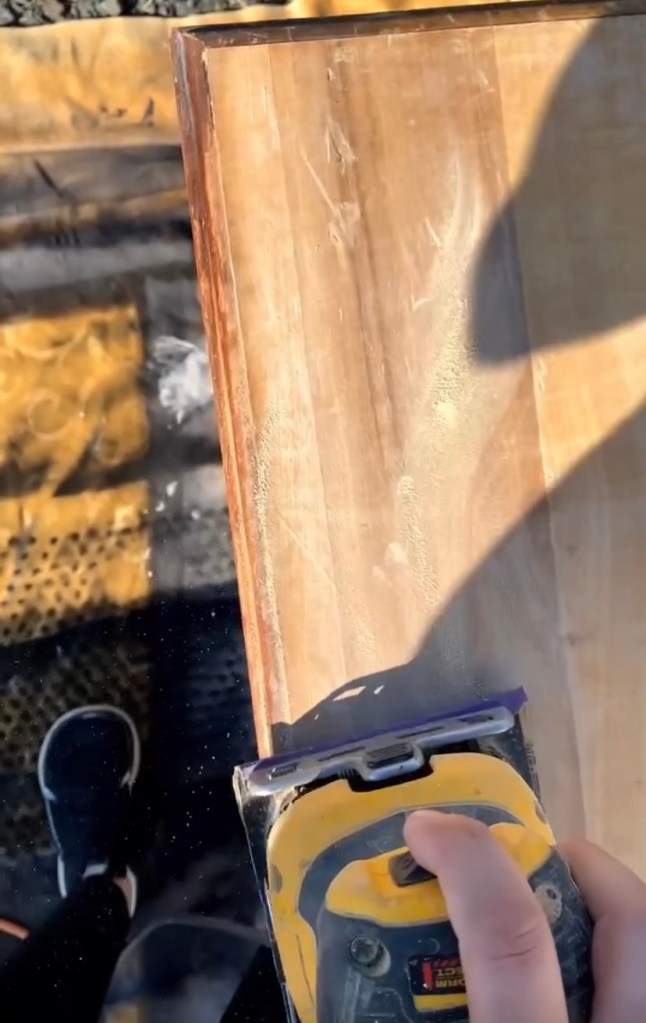
After I removed the veneer from the top and trim, and wiped the piece clean, I sanded the beautiful wood to remove any imperfections. Then, I scuff-sanded the rest of the table to prep it for paint.
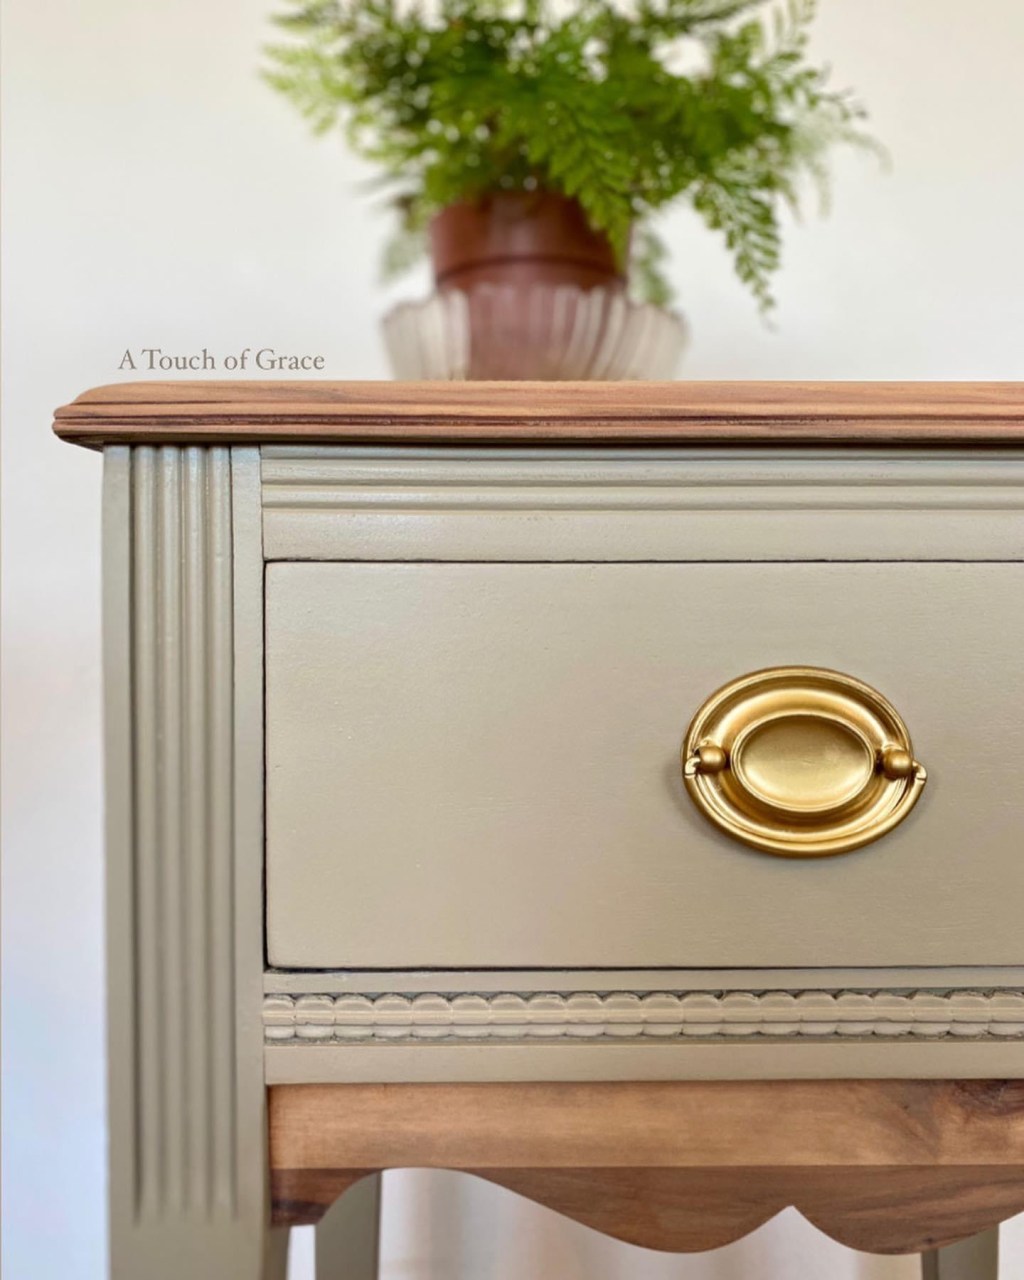
I used Bar Keeper’s Friend and water to clean up the original hardware.
Apply White Wash & Wood Conditioner
I mixed a tanwash (1:1 ratio of water to paint) to apply to the top and used Howard’s Feed-N-Wax product to polish and condition the wood.
Add Drawer Liner
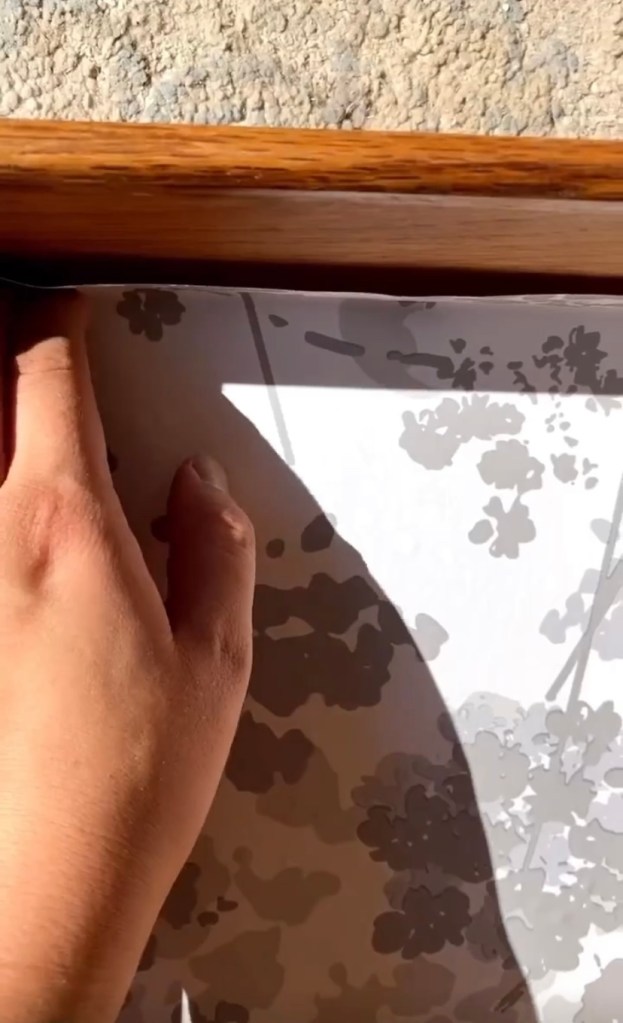
Lastly, I added a peel & stick liner to the inside of the drawers to give the piece a personalized touch.
The Reveal
And look at it now! The natural wood grain is SO stunning along with the original hardware.

Leave a comment