
Have you ever tried something new – with no prior research – and thought it’d turn out perfect? Yeah… that was me the first time I tried doing cane webbing doors.
Now I know better and I’m going to share my steps with you so you can make a PERFECT cane webbing door!
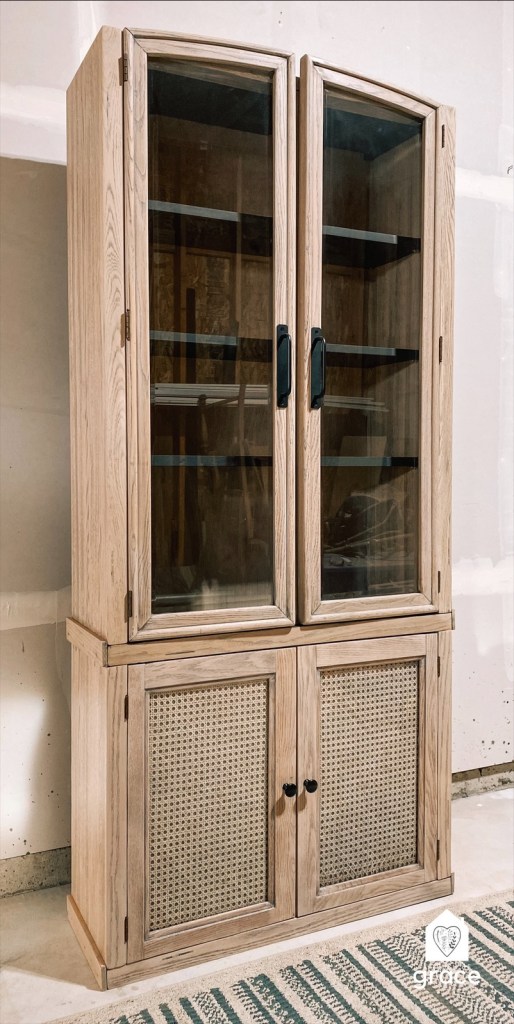
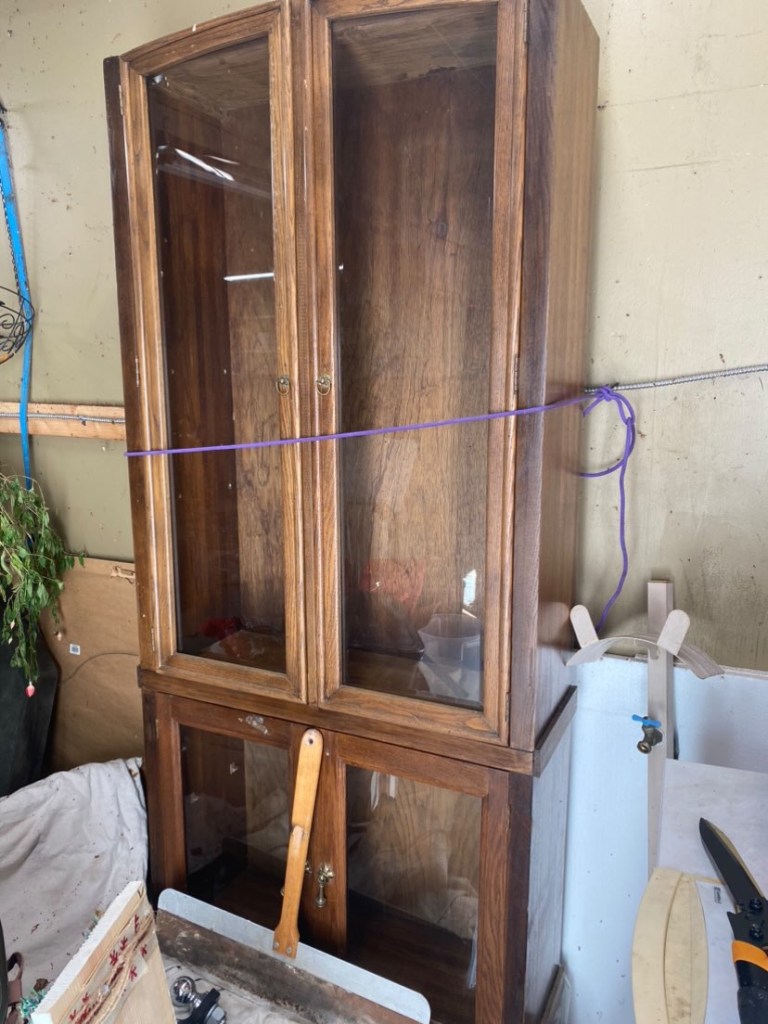
This outdated, dark-stained, solid wood piece came from a client. She inherited it from her great-grandma and wanted me to make it into her dream cabinet.
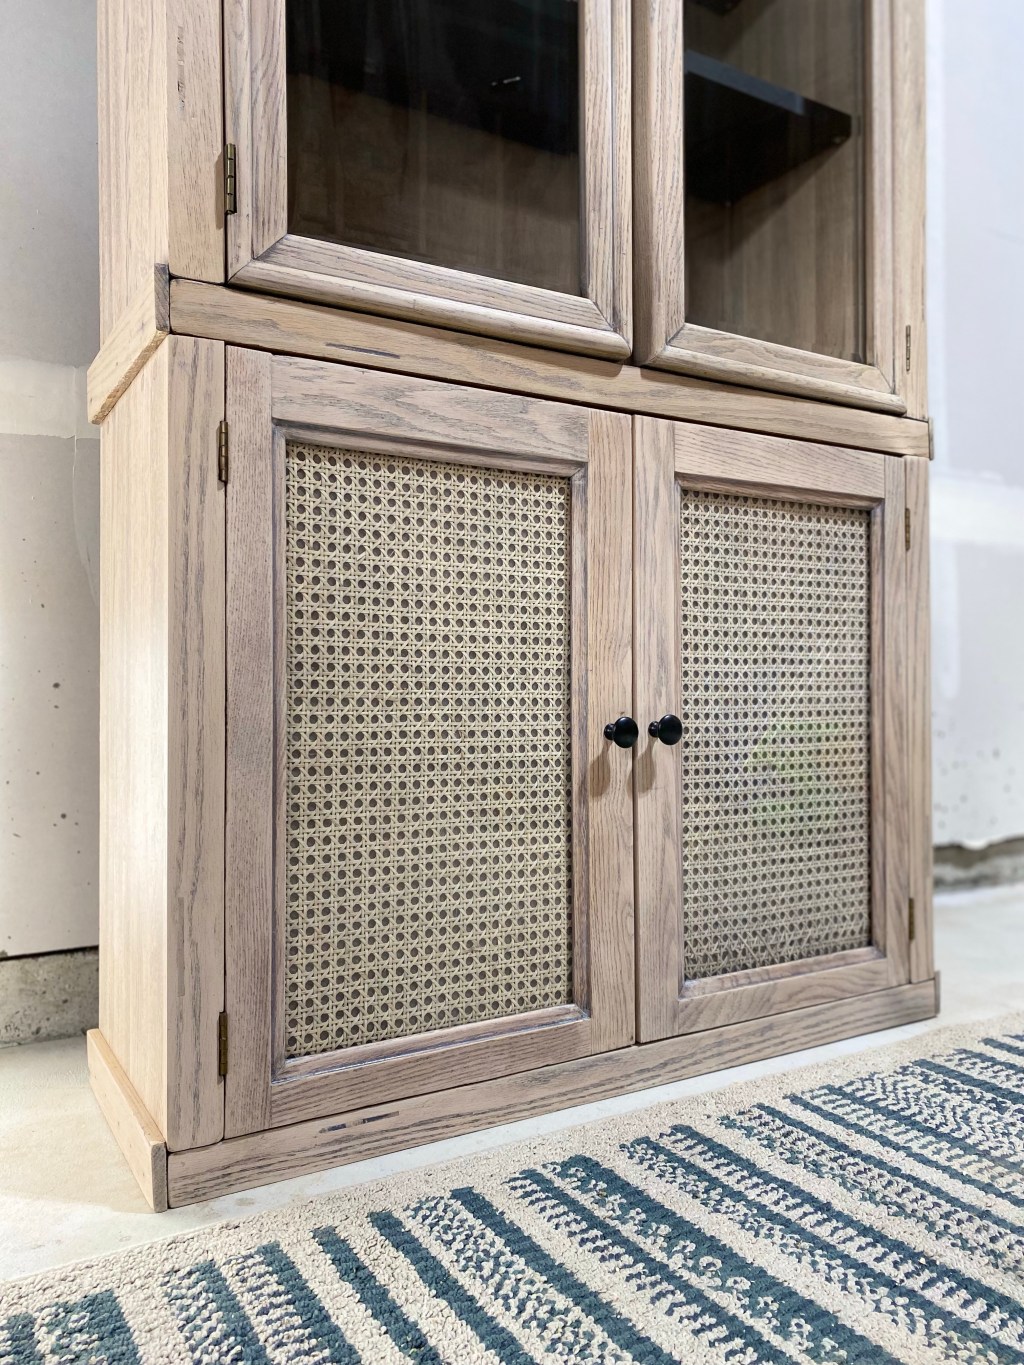
As she was explaining her vision for the piece, we decided on doing cane webbing for the bottom doors while keeping the top doors glass. I was sweatin’ because I knew my last cane webbing project was a flop. But if you take a look at the “after” photo of this vintage piece… I’d say I learned a new skill!
Steps:
- Core Materials Used
- Measure & Make Back Panel
- Measure & Cut Cane Webbing
- Fill a Storage Bin with Warm Water
- Soak the Cane Webbing
- Secure the Cane Webbing
- Side Note:
- The Reveal
Core Materials Used
I receive commissions for purchases made through links in this post.
- Cane Webbing: Natural Rattan Webbing
- Craft Scissors: Heavy Duty All Purpose Scissors
- Tape Measure: Craftsman Tape Measure 25 ft
- Stapler: Heavy Duty Staple Kit
- Warm Tap Water
- Large storage tub or a bathtub
- Back board (particle or plywood panel cut to your size)
Measure & Make Back Panel
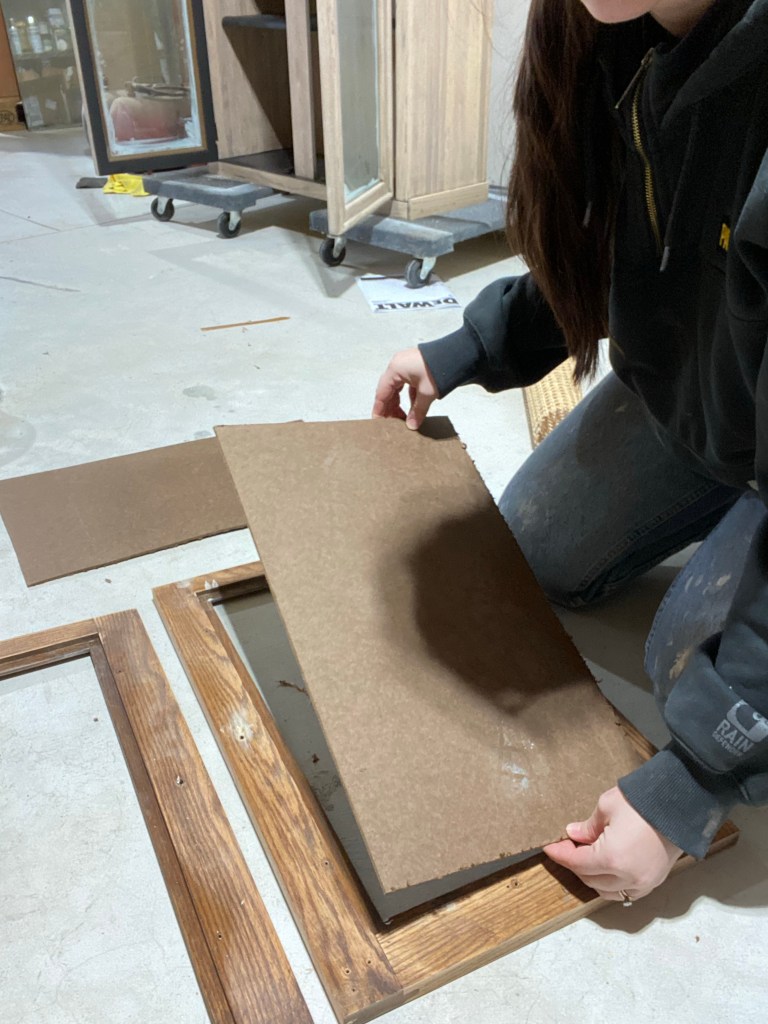
Since the bottom doors originally had glass inserted into them, I measured the glass and cut my board to size. We chose to create this look with a back panel so that visitors wouldn’t be able to see what is stored behind this door and to make sure the entire piece looked the same.
Measure & Cut Cane Webbing
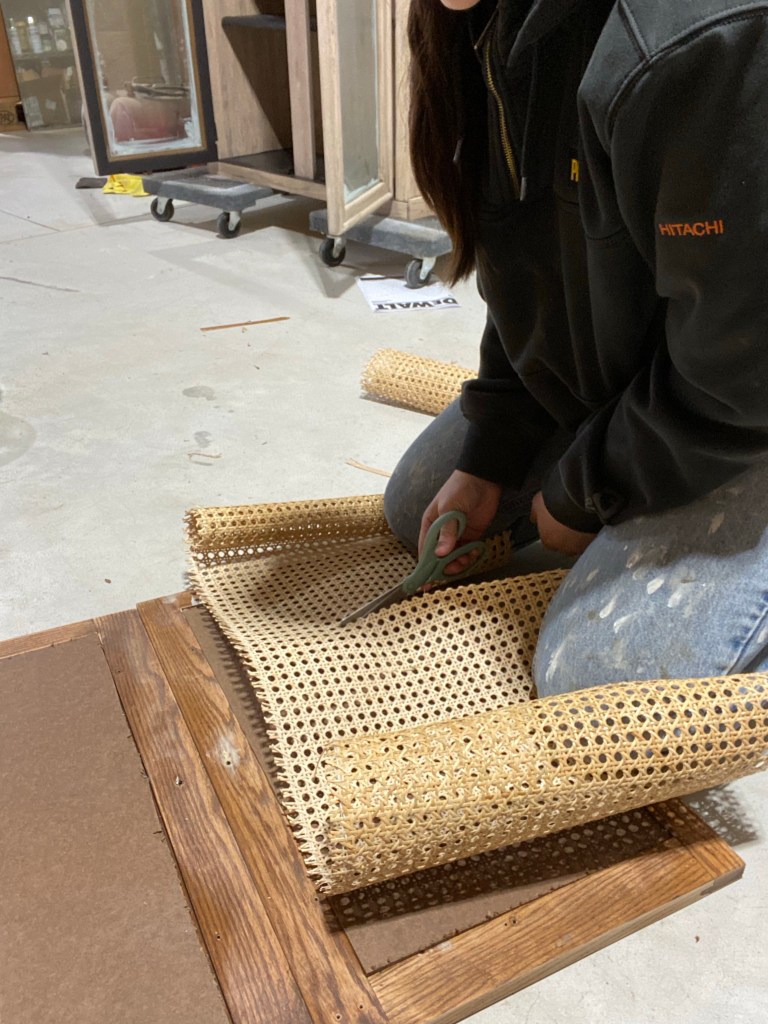
This step was difficult because the cane wanted to keep rolling on me while cutting. So to work around that, I placed my knees on either side of where I needed to make the cut.
Fill a Storage Bin with Warm Water
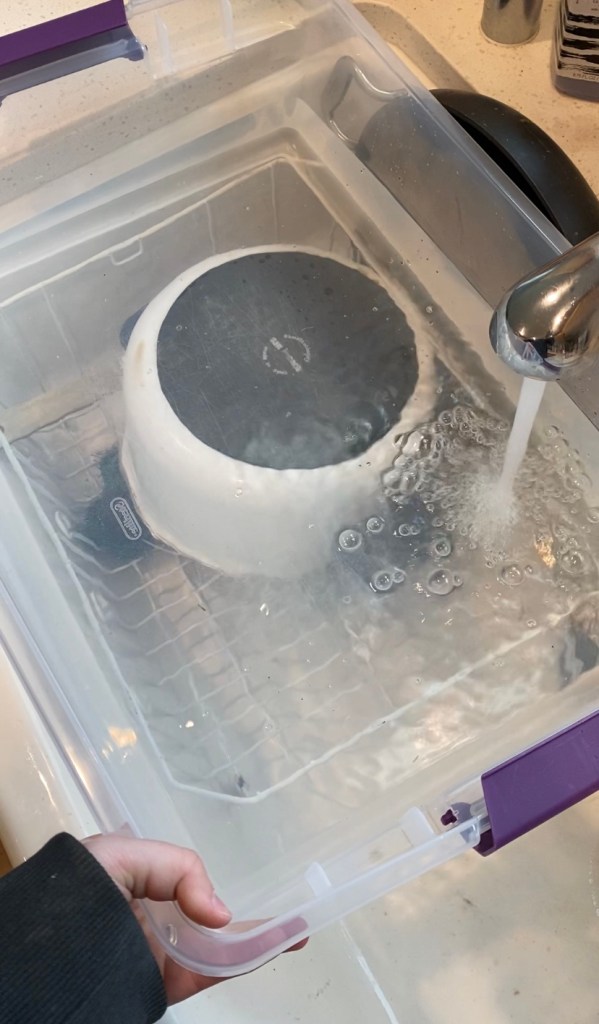
I was able to find a storage bin that I already had large enough to fit the cane webbing sections. If you do not have a storage bin that fits your project, use your bathtub!
Soak the Cane Webbing
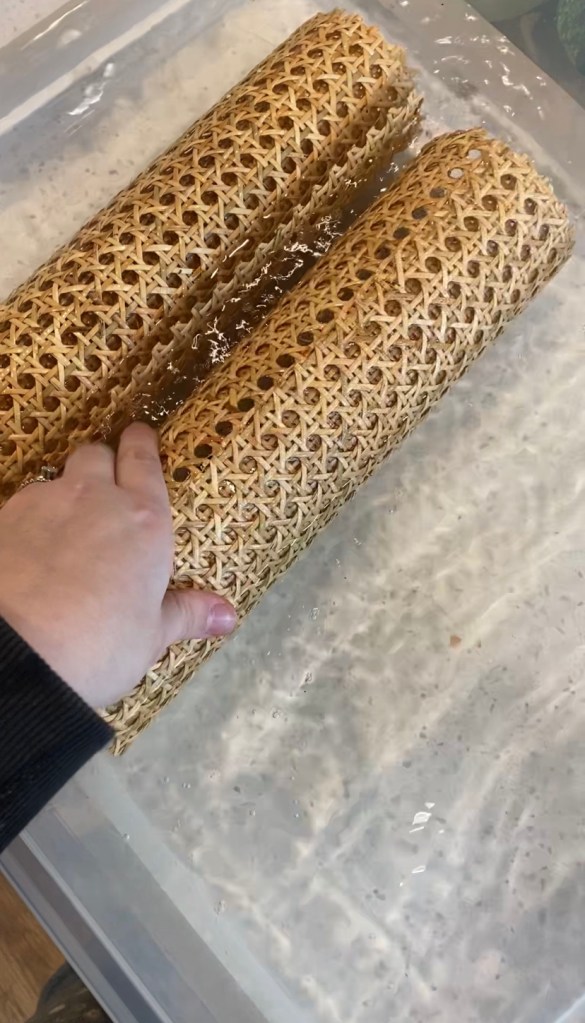
Now, this is the step to NOT miss. Soak your cane webbing sections for approximately 30 minutes. This time limit is the sweet spot because it makes the cane flexible enough to work with it but not overly soaked to where it damages the rattan.
You will do your project while the cane is still damp. As it dries, it tightens. This will help your project not look too loose or sag.
Secure the Cane Webbing
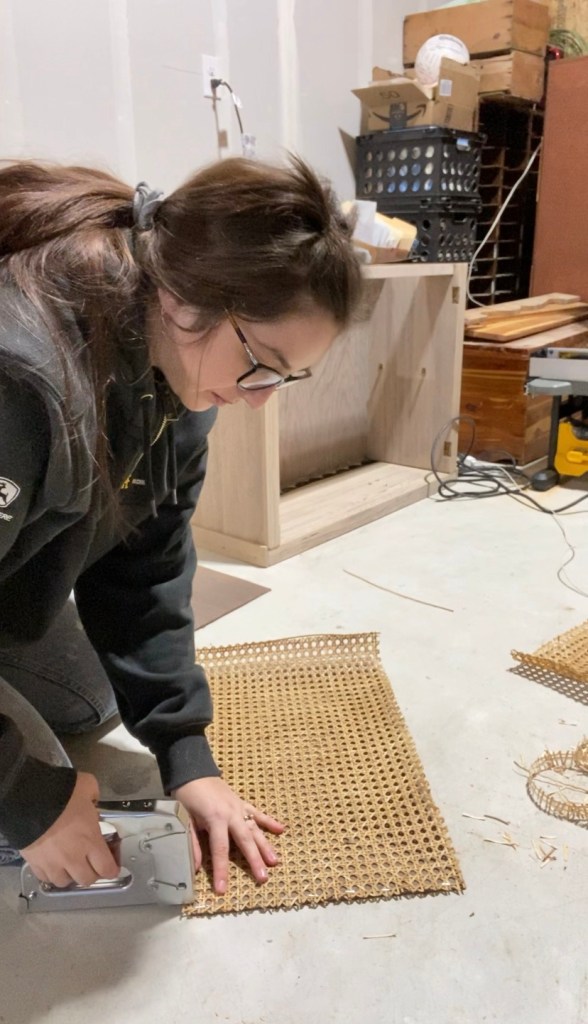
Arrange your cane webbing on the back panel and use a heavy-duty stapler to staple the perimeter down. This will secure your rattan in place as it dries and will prevent it from fraying.
Allow your cane webbing to fully dry before painting or usage.
Side Note:
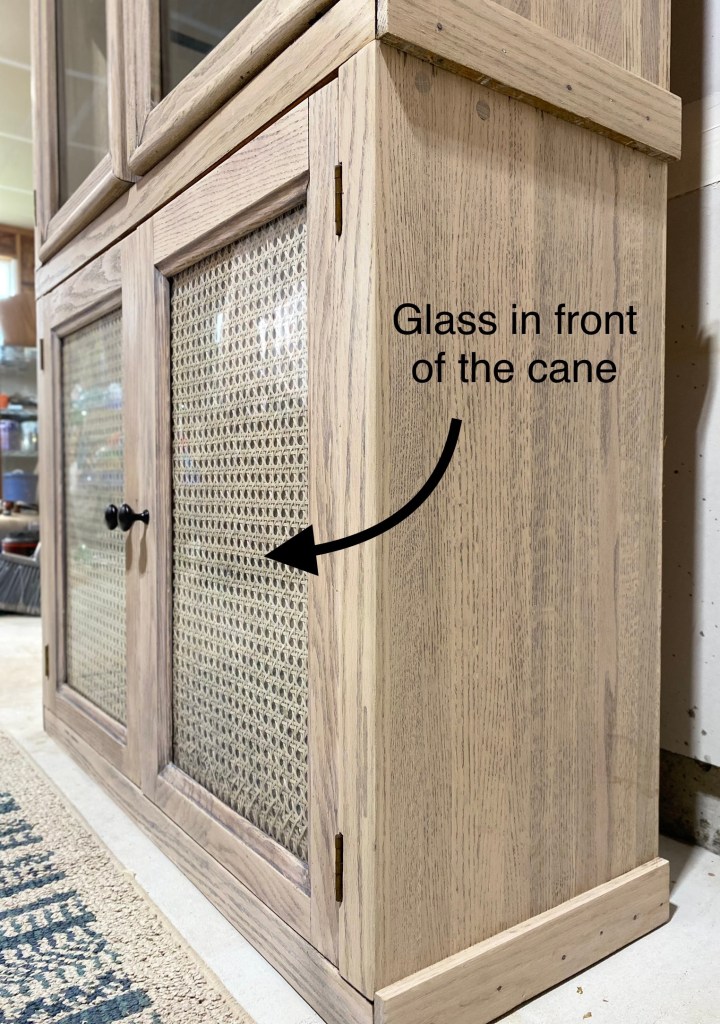
I could have left it with the cane webbing exposed, however, my client and I decided to place the glass in front of the rattan panel. She currently has a fast-growing 9-month-old baby boy and with it being right at his height, we would be devastated if his tiny fingers pulled on the rattan door and made it come undone. Kids man.
When inserting the cane webbing panel, I used the exact same hardware that secured the glass in the door. The cane and the backboard only added about 3/8″ to the backside of the door.
The Reveal
And there you have it! A simple way to update a piece by making Cane Webbing Doors!


Leave a comment