
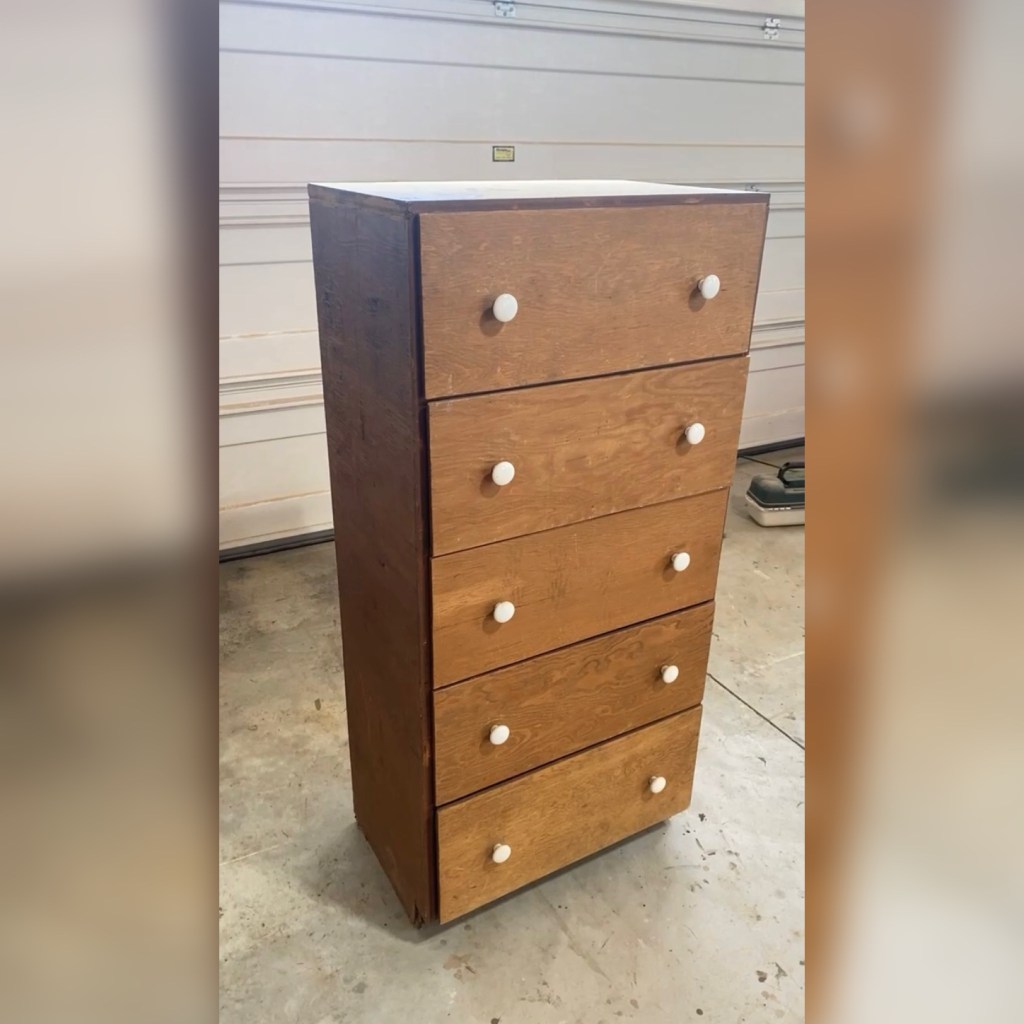
I want to share one of my favorite products… Edgemate. From my many aisle browsings that I do Home Depot, I’ve found a game changer when it comes to plywood.
It used to take me ages to wood fill these edges before painting it so it’d appear like a solid, smooth surface. Using this product has saved me so much time. And not only can you paint it, there are different wood type options AND it’s stainable! Here I’m using Red Oak.
Steps:
- Core Materials Used
- Start with a Clean Plywood Edge
- Cut the Edgemate
- Apply Edgemate
- Sand the Edges to Size
- *Extra Tips*
- The Reveal
Core Materials Used
I receive commissions for purchases made through links in this post.
- Veneer Edging: Edgemate (Found in the plywood isle at Home Depot)
- Craft Iron: Sunbeam Classic Iron
Start with a Clean Plywood Edge

You want your edge clean of dust and debris. If your edge is not clean then the veneer glue will not adhere well.
Cut the Edgemate
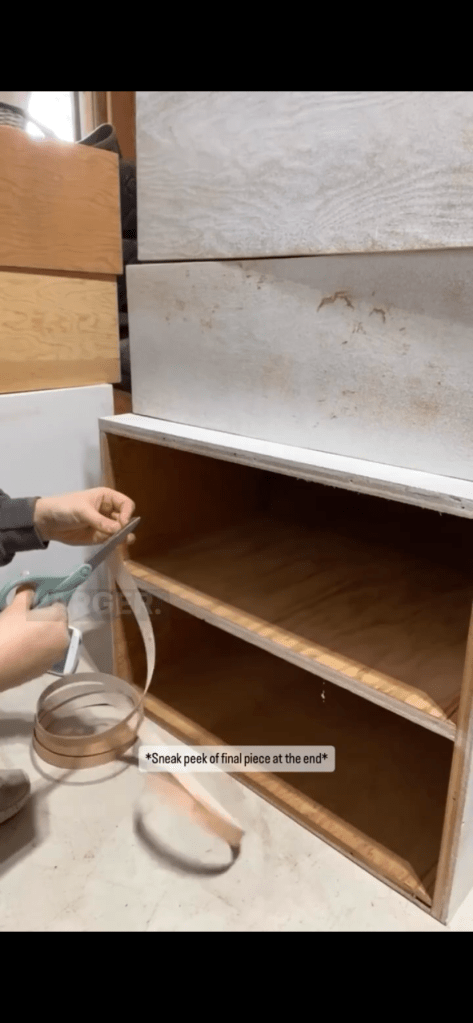
Estimate how much you need and cut it slightly longer.
Apply Edgemate
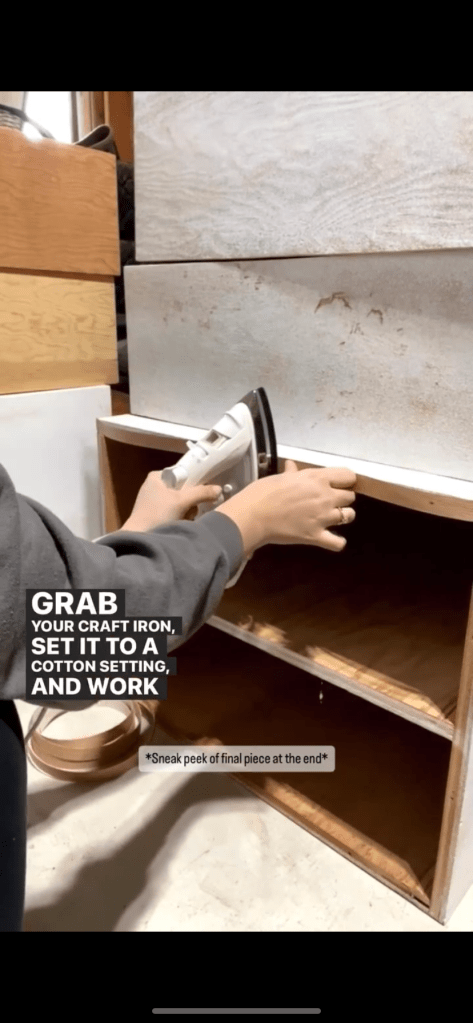
Set your craft iron to the cotton setting
Hold it in place at the middle, and apply your iron slowly, going in the direction inside to outside
As it’s cooling, use a flat surface (I use my fingers sometimes) to make sure it’s firmly on the edge
Sand the Edges to Size

Once it’s cool to the touch, use 80-grit sandpaper to sand away any excess veneer edging
Clean with a microfiber cloth
Paint or stain your color of choice!
*Extra Tips*
The veneer strip is 13/16”, meaning it’s just UNDER 1 inch. You can use this on plywoods of various thicknesses, but just remember you’ll have an excess.
Do NOT use a knife or razor blade. I mean you could, but I don’t like how sharp the edge is and I personally have a hard time keeping the cut straight. Using rough sandpaper makes it blend into the edge.
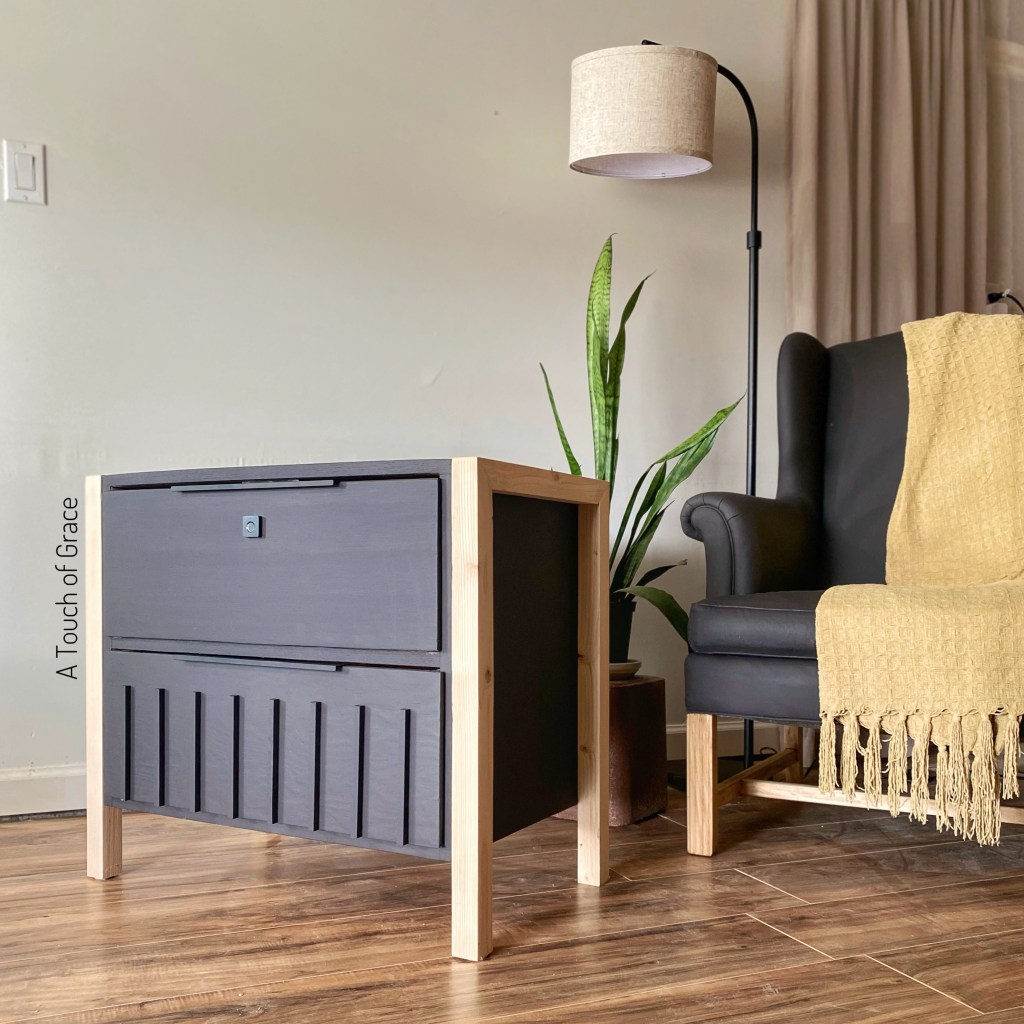
The Reveal
Find this helpful?
Love this post, Leave a comment, Save for later!


Leave a comment